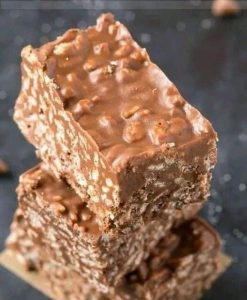
Indulging in a sweet treat doesn’t always require hours of baking and complicated recipes. If you’re craving something delicious and satisfying, look no further than these delightful No-Bake Homemade Crunch Bars. Packed with the rich flavor of semi-sweet chocolate, the melt-in-the-mouth goodness of coconut oil, and the delightful crunch of crispy rice cereal, these bars are a perfect blend of simplicity and taste. In this article, we’ll guide you through the easy steps of creating these mouthwatering treats.
Ingredients:
Before we dive into the step-by-step instructions, let’s take a look at the key ingredients that make these No-Bake Homemade Crunch Bars a delectable delight:
| Semi-sweet chocolate chips | 2 cups |
| Coconut oil | 1 tablespoon (for that melt-in-the-mouth feel) |
| Crispy rice cereal | 2 cups |
Note: For health-conscious individuals, you can opt for a healthier twist by swapping the semi-sweet chocolate chips with dark chocolate chips.
Instructions:
Prep Your Pan
Start by preparing your pan to ensure easy removal of the bars later on. Line an 8×8-inch square pan with parchment paper. This simple step will make it a breeze to lift and cut your bars.
Melt It Down
In a large microwave-safe bowl, combine your semi-sweet chocolate chips and coconut oil. Microwave the mixture in 20-second intervals, stirring after each interval. Keep microwaving and stirring until the mixture turns smooth and well-combined.
Add The Crunch
Now comes the fun part – adding the crispy rice cereal. Gently fold in the cereal, ensuring that every grain is coated with the luscious melted chocolate. This is where the magic happens, as the combination of textures creates a truly delightful experience.
Set & Forget
Transfer the mixture to the prepped pan, and use a spatula to smooth it out evenly. Pop the pan into the refrigerator for a minimum of 2 hours, allowing the bars to set and become firm.
Slice & Serve
Once the bars are set and ready to be devoured, use the parchment paper edges to lift the block out of the pan. Place it on a cutting board and carefully cut it into your desired bar or square sizes. Now, it’s time to enjoy the fruits of your labor – the delicious No-Bake Homemade Crunch Bars!
FAQs (Frequently Asked Questions)
Can I use dark chocolate chips instead of semi-sweet chocolate chips?
Absolutely! Swapping semi-sweet chocolate chips with dark chocolate chips is a great way to create a slightly healthier version of these bars without compromising on taste.
How long should I refrigerate the bars?
It’s best to refrigerate the bars for a minimum of 2 hours, or until they are set and firm to the touch. This ensures that they hold their shape when you cut them into pieces.
Can I add nuts or dried fruits to the mixture?
Certainly! You can get creative and add chopped nuts, dried fruits, or even a sprinkle of sea salt to enhance the flavor and texture of your crunch bars.

Are these bars suitable for children?
Absolutely! These No-Bake Homemade Crunch Bars are a kid-friendly treat that both adults and children will enjoy. Just be cautious with any potential allergens when customizing the recipe.
How should I store the leftover bars?
To keep the bars fresh and maintain their texture, store them in an airtight container in the refrigerator. They should stay delicious for up to a week.
Can I make these bars in advance for a special occasion?
Definitely! These bars are a wonderful make-ahead dessert. Prepare them a day or two in advance, refrigerate them, and they’ll be ready to impress your guests.
Indulging in a sweet treat doesn’t have to involve hours in the kitchen. With the No-Bake Homemade Crunch Bars recipe, you can create a delightful treat that’s simple, delicious, and satisfying. Whether you’re craving a quick dessert or planning a special occasion, these bars are sure to be a hit. So, gather your ingredients, follow the easy instructions, and treat yourself to the irresistible blend of chocolatey goodness and satisfying crunch. Your taste buds will thank you!
Leave a Reply